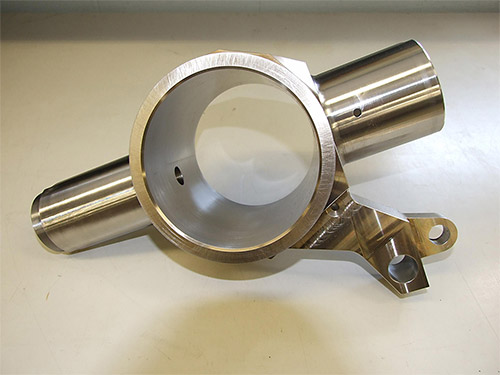
An aerospace client required multiple I.D. holes on a hinge, made of 4340 steel with a Rockwell hardness of 39 – 43. For this Level 2 Flight Safety part, we used our Sunnen honing machines & tooling to vertically hone three different-size holes. The customer also required a material microfinish of 16 and 63, meeting tolerances of + .0005″.
To learn more about this I.D. honing project, please see the details below. For more information about our other services, please contact CT Hone, Inc.
Steel Vertical Hinge Project Highlights
- Product Name
-
Vertical I.D. Honing of a Vertical Hinge
- Product Description
-
We had to hone multiple holes in this vertical hinge for the aerospace industry.
This component is a Level 2, Flight Safety part.
- Capabilities Applied/Processes
-
Vertical I.D. Honing
- Equipment Used to Hone Part
-
Sunnen Honing Machines & Tooling
- Overall Part Dimensions
-
I.D. of Honed Holes:
- .7184″
- .9997″
- 5.2497″
- Tightest Tolerances
-
+ .0005″
- Material of Component
-
4340 Steel, Rockwell Hardness 39 – 43
- Maximum Material Finish
-
16 & 63 Microfinish
- In Process Testing/Inspection Performed
-
- Dimensional inspection with Sunnen gages
- Surface finish inspection with Bendix profilometer
- Industry for Use
-
Aerospace
- Standards Met
-
- Customer supplied operation sheet
- 2D CAD drawing & specifications

